Tuesday, December 13, 2011

FileWall : An encryption file system-based software

FileWall is a lightweight transparent encryption file system-based software. Integrated in the Explorer context menu.The final effect is similar to NTFS using the built-in file encryption, but FileWall not so tight fit in the system, dependent on NTFS.FileWall can be used in all of the above Windows 2000 operating system, and supports any file system known theoretically unknown file systems are supported.


On the security side, FileWall using AES-128 as the default encryption algorithm, encryption of the data block. Data encryption, unless someone can get the password, or by any means are unable to obtain the original data. So please save your password.

Download FileWall from Here

Source: hummerstudio.com

Hey! My friends, If you like my post you can save it using "Save Page as PDF" button below and you can even share them to your friends with social networking buttons provided below this post.

Add To Google BookmarksStumble ThisFav This With TechnoratiAdd To Del.icio.usDigg ThisAdd To RedditTwit ThisAdd To FacebookAdd To Yahoo

Tuesday, December 6, 2011

GSview : A Tool To Convert PS Files to PDF Files.

GSview is a graphical interface for Ghostscript. Ghostscript is an interpreter for the PostScript page description language used by laser printers. For documents following the Adobe PostScript Document Structuring Conventions, GSview allows selected pages to be viewed or printed. GSview requires Ghostscript. GSview is available for Windows, OS/2 and Linux.

GSview was written by Russell Lang at Ghostgum Software Pty Ltd. Ghostscript was originally written by Aladdin Enterprises and is now maintained by Artifex Software, Inc.

How to convert PS to PDF?
1. Open a PS Viewer / Browser (Here, we take GSView as an example)

2. Open a PS (Post Script) document

3. Select from main menu "File"->"Print"

4. Select Printer "Virtual PDF Printer"

5. If you need to adjust PDF generation options, click the "Property" button on the right

6. Click "OK"

7. A dialog will pop up, assign the folder and file name of the PDF document to be generated


8. Congratulations! You have converted PS to PDF document now.

If you are using Windows 7, please try GSview 4.91 beta.

Requires: Ghostscript

Download GSview from Here

Source: pages.cs.wisc.edu

Hey! My friends, If you like my post you can save it using "Save Page as PDF" button below and you can even share them to your friends with social networking buttons provided below this post.

Add To Google BookmarksStumble ThisFav This With TechnoratiAdd To Del.icio.usDigg ThisAdd To RedditTwit ThisAdd To FacebookAdd To Yahoo

Sunday, November 27, 2011

Notepad 7 – A Text Editor with MS Office 2010 Look

Notepad7 is a text editor, like Microsoft Notepad, with MS Office 2010 Look and Feel. The Office 2010 style ribbon interface gives instant access to text editing features.


Using Notepad7 is so simple, just type on textbox and save with default extension '.txt'. If you want to open '.txt' file with notepad7, just change 'Opens with' application property. To do that, right click on the text document and choose properties. Click on 'Change' button of opens with application and browse '%PROGRAMFILES%/Notepad/Notepad7.exe'.

Notepad-7 will run only on the following systems:
  • Microsoft Windows Vista Service Pack 2
  • Microsoft Windows 7
  • Microsoft .Net Framework 4.0

Download Notepad 7 from Here

Source: skyforu.info

Hey! My friends, If you like my post you can save it using "Save Page as PDF" button below and you can even share them to your friends with social networking buttons provided below this post.

Add To Google BookmarksStumble ThisFav This With TechnoratiAdd To Del.icio.usDigg ThisAdd To RedditTwit ThisAdd To FacebookAdd To Yahoo

Friday, November 25, 2011

ePub to Mobi : A Tool That Converts eBooks from .epub to .mobi Format

Both EPUB and MOBI are very popular e-book format. The EPUB is a free open standard, one EPUB file internal use XHTML or DTBook (a by DAISY Consortium's XML standard) to show the text. And the Amazon Kindle has been very popular today, the Kindle use the MOBI format, so if you are a Kindle user and have a lot of EPUB books, you should need this small software. And, at the best, this software is a completely free and simple.


Currently, several software can convert *.epub files to *.mobi files, such as Amazon's kindlegen, but its command line is inconvenient for non-professionals or beginners,. This program is based on kindlegen, can help the normal users can more easily to complete the file conversion by themselves, moreover it provides more formatting and conerting jobs.


ePub to Mobi is a free software that can convert the *.epub e-books to *.mobi e-books. It supports batch conversion, you can one time convert many files. This software will automatically extract the original contents of each EPUB file, then analysis, format and convert these files. The conversion process is very fast.

After running the software, press the hotkey "Ctrl + O" to select the *.epub files you want to convert, then press "Cltr + E" to start the conversion, you need to specify an output folder, the resulting *.mobi files will are stored in the output folder.

Download ePub to Mobi from Here

Source: epubtomobi.com

Hey! My friends, If you like my post you can save it using "Save Page as PDF" button below and you can even share them to your friends with social networking buttons provided below this post.

Add To Google BookmarksStumble ThisFav This With TechnoratiAdd To Del.icio.usDigg ThisAdd To RedditTwit ThisAdd To FacebookAdd To Yahoo

Thursday, November 10, 2011

PeerGuardian : An Application That Block Connections To IP Address Which Transmit Spyware

PeerGuardian is IP Blocker which can block connection to know blacklisted IP addresses which are know to spread malware and helps keep your system protected. PeerGuardian helps protect your privacy by blocking many ranges of aggressive IPs while you use P2P.

Steps to setup and configure PeerGuardian:
  • Download and Install the app
  • Next Open IBlockList
  • Now Open PeerGuardian and follow the Wizard and setup the application choosing what you want to block using PeerBlocker.


Next update the list of blocked IP Addresses, by default you find it say Blocking 0 IP’s in the application.To update the IP lists click the “List Manager” in the PeerGuardian and next select the list which you want to update and click on “Edit” to enter the new update URL which can be copied from the IPBlockList website.


Close the “List Manager” and Click “Check Updates” and you should see that the Blocked IP list goes up.

By default the application comes with the option to block on few category of IP ranges, you can more to the Block List by “Adding” from the List Manager and entering the new “Update URL” similar to step for updating the URL’s.

For more information about what each list block, click on the ListName in I-Blocker for information related what the list block and how frequently the list is updated etc.,

PeerGuardian is available for Windows OS and Mac OS.

Download PeerGuardian from Here

Source: Sourceforge.net

Hey! My friends, If you like my post you can save it using "Save Page as PDF" button below and you can even share them to your friends with social networking buttons provided below this post.

Add To Google BookmarksStumble ThisFav This With TechnoratiAdd To Del.icio.usDigg ThisAdd To RedditTwit ThisAdd To FacebookAdd To Yahoo

Monday, November 7, 2011

Double Driver : A BackUp Tool That Restore System Drivers

One of the main reasons why you would want to collect installed drivers is if you don’t have the Driver CD that came with the computer or they are unavailable online. This comes in quite handy if you purchase a computer and want to backup the initial set of drivers. It can be quite difficulty for example to find drivers for hardware installed in a notebook if the operating system has to be setup again. Luckily Double Driver can now lend you a hand with that and save you a lot of time.


Double Driver is a very simple and useful tool which not only allows you to view all the drivers installed on your system but also allows you to backup, restore, save and print all chosen drivers.

Double Driver analyzes your system and lists the most important driver details such as version, date, provider, etc. All drivers that are found can easily be backed up the application and easily restored at a later point in one go.

How to Backup Drivers?
  • Open Double Driver
  • Click “BackUp”
  • Click “Scan” in the toolbar.
  • List of all installed drivers are shown, Select the drivers you want to backup and
  • Click “BackUp” and navigate to the folder where the backup is to be stored.
  • You can also scan a system for a non-live system for drivers by clicking “Scan Another System” to scan and backup drivers of the OS installed on a different drive.


How to Restore Drivers From Backup?
  • Open Double Driver, and click on the “Restore” button in the toolbar.
  • Click “Locate BackUp” and point to the Backup Folder and click “Restore”.


Download Double Driver from Here

Source: boozet.org

Hey! My friends, If you like my post you can save it using "Save Page as PDF" button below and you can even share them to your friends with social networking buttons provided below this post.

Add To Google BookmarksStumble ThisFav This With TechnoratiAdd To Del.icio.usDigg ThisAdd To RedditTwit ThisAdd To FacebookAdd To Yahoo

Saturday, November 5, 2011

Caesium : A Tool To Compress Images Without Loosing Image Quality

Image compression is underestimated but can have many important uses.Can be useful to webmasters who have many images on their website and want to reduce the loading time. Is also important for people who attach photos to emails and want to send it quickly. And what about Social Networks? People upload a lot of pictures on Facebook, Google+ etc, and with Caesium you can drastically reduce the upload time. And if you just want to store your images on your Hard Drive think how many space are you wasting without compressing them!. Caesium can reduce the size of pictures up to 90%, preserving the original visual quality.

Caesium allows you to save a lot of space on your hard drive and quickly upload your pictures on the web (on sites like Facebook, Google+ etc) saving a lot of time. Also webmasters and bloggers for instance need to make sure the images they post on their websites are optimized, to avoid prolonged loading times for their visitors. The software allows you to view instantly the compression results, helping you to decide how much optimization you need. Caesium can set different compression levels to each image, saving a lot of time, ensuring great results!

Download Caesium from Here

Source: caesium.sourceforge.net

Hey! My friends, If you like my post you can save it using "Save Page as PDF" button below and you can even share them to your friends with social networking buttons provided below this post.

Add To Google BookmarksStumble ThisFav This With TechnoratiAdd To Del.icio.usDigg ThisAdd To RedditTwit ThisAdd To FacebookAdd To Yahoo

Thursday, November 3, 2011

Minimem : A Memory Optimization Tool

Initially developed for Firefox only, Minimem now can reduce the memory footprint of any application. It runs in the background and can be set up to optimize as many proceses as you'd like, using a very intuitive graphical interface. Unlike other memory optimization tools, it gives you full control over what applications you want to optimize, when and how often, as well as the possibility to only optimize memory when required and relevant.


It optimizes memory by removing as many non-necessary memory pages as possible from the selected processes. It does so at regular intervals which can be user-defined as well and every 30s by default, though uses an advanced pooling mechanism to ensure the CPU usage of Minimem remains low at all times. This then optimizes your applications which can load those pages back whenever they need, and makes your overall system perform much better whenever it is memory limited.

Minimem runs in the background and is fully non-intrusive. It stays in your tray where you can access its settings at any time and will remember your favorite settings for an optimal ease-of-use. Its intuitive GUI should make it useable for any type of user so no specific skills are required to take advantage of this great tool.

Typical applications are:

  1. Reducing the memory footprint of memory-heavy applications that should not e.g. web browsers or office applications
  2. Making it easier to run applications with memory leaks, e.g. Firefox 2 or extremely large footprints e.g. Firefox 3
  3. Running multiple applications on the same computer e.g. web desktop tool, web browser, office application all concurrently
  4. Use computers that are not so recent with modern applications

And many more...

Minimem is available both as a 32 bits and a 64 bits native application, though the 32 bits version will work on all modern Windows OS including XP, Vista, Server and Windows 7.

Download Minimem from Here

Source: main.kerkia.com

Hey! My friends, If you like my post you can save it using "Save Page as PDF" button below and you can even share them to your friends with social networking buttons provided below this post.

Add To Google BookmarksStumble ThisFav This With TechnoratiAdd To Del.icio.usDigg ThisAdd To RedditTwit ThisAdd To FacebookAdd To Yahoo

Tuesday, September 20, 2011

USB Protector : A tool That Removes Autorun Viruses from USB Drives

Virus!! Virus!! Virus!! The most common problem that we are facing today with our Windows based systems.

Despite of the virus attacks from WWW, we are facing threats from local hardware like USB, Pen drives and so on..It’s the right time to safeguard your hardware devices in a effective way. And one of the great solutions is USB protector.


USB protector is a small tool developed in .Net 3.0 to prevent malware infections through USB Removable Storge Drives. It can detect and eliminate malwares automatically And provides a full scan of the drive to find hidden files.

USB Protector provides a Realtime Scanning mechanism (RTS) so that malwares are detected on time when a removable storage drive is attached. Once you install USB Protector it will be automatically added to startup list so it can run every time windows reboot. The UI of USB Protector is not cluttered with many options and provides minimum required options such as Scan and Analyse Drive.

If you have already connected removable USB storage device to PC you can just hit scan option to initiate USB drive scanning. USB protector will list any autorun or infected files are found in USB. USB protector is still in beta mode and final version is yet to be released. USB Protector supports Windows XP, Vista & Windows 7. It is very tiny and takes less memory.

NOTE: .Net framework 3.0 or higher must be installed on your system to run USB Protector.

Download USB Protector from Here

Source: ajeeshms.web.officelive.com

Hey! My friends, If you like my post you can save it using "Save Page as PDF" button below and you can even share them to your friends with social networking buttons provided below this post.

Add To Google BookmarksStumble ThisFav This With TechnoratiAdd To Del.icio.usDigg ThisAdd To RedditTwit ThisAdd To FacebookAdd To Yahoo

Sunday, September 18, 2011

After Boot Viewer : A Tool to View Programs & Files Loaded After Windows Boot

After Boot File Viewer is a simple software that will display the programs that load after PC boot. After Boot File Viewer can be useful for detecting viruses or unexpected behavior at computer startup. The utility can be run any time once your Windows is booted


Download After Boot Viewer from Here

Source: softpedia.com

Hey! My friends, If you like my post you can save it using "Save Page as PDF" button below and you can even share them to your friends with social networking buttons provided below this post.

Add To Google BookmarksStumble ThisFav This With TechnoratiAdd To Del.icio.usDigg ThisAdd To RedditTwit ThisAdd To FacebookAdd To Yahoo

Thursday, August 18, 2011

Kid Key Lock : A simple program to lock specific keyboard and mouse functions


Kid-Key-Lock application was designed to be a simple program to lock specific keyboard and mouse functions.

Kid-Key-Lock's purpose is to lock specific keyboard keys/combinations and specific mouse functions. Kid-key-lock can be used to prevent accidental presses of the right mouse click, double click, and key combinations such as Alt-F4, Alt-Tab, the "Start" key, etc. It is ideal to be used with young children games, when you want to let your children play a computer game but you dont want them to mess around with your PC.

Kid-Key-Lock is ideal to be used in order to prevent toddlers from accidentally pressing unwanted buttons on your keyboard and mouse.

When Kid-Key-Lock is running, an indicator icon will appear on your system tray. When you click on the tray icon a pop-up menu will appear. All program functions, including the setup dialog box are accessible from this menu.

Password to enable/disable lock or to quit kid key lock can be set in the options menu.In case you lock all the keyboard buttons and mouse just enter either of the keys to to unlock keyboard or to exit the application.A no install version ie ., a portable version is also available in a zip format.Just extract the bin folder from the zip and double click kidkeylock.exe to start the application.

Download Kid Key Lock from Here

Source: 100dof.com

Hey! My friends, If you like my post you can save it using "Save Page as PDF" button below and you can even share them to your friends with social networking buttons provided below this post.

Add To Google BookmarksStumble ThisFav This With TechnoratiAdd To Del.icio.usDigg ThisAdd To RedditTwit ThisAdd To FacebookAdd To Yahoo

Tuesday, August 9, 2011

USBFlashCopy : A Utility Tool To Backup Your Flash Drives


USBFlashCopy is a small Windows utility to back up your flash drives and storage cards on the fly. It runs in the background and copies files from inserted media to a safe location on your hard drive.

Simply plug in the media and use it as usual, USB Flash Copy automatically backups your data in the background. Destination folders are created automatically, but you can define profiles to assign copy options to particular flash sticks or cards. Full version features silent mode to remove popups, prompts or any visibility at all.

The first time you connect a drive, the software will ask if you want to create a backup profile, at which point you can choose where to store the backup, files to ignore (if any) and how to process modified files (overwrite or save a copy). USBFlashCopy uses the drive's serial number to identify the drive and will automatically run the configured profile the next time you connect it. To speed up the backup process, only newer or update files are included in subsequent backups, saving you time and unnecessary copying.

USBFlashCopy is a really small utility taking no more than 300KB of space, it doesn't require additional libraries, frameworks or anything else to download and install. It is free for non-commercial use. You would need an unlock key to use Silent Mode.

Download USBFlashCopy from Here

Source: usbflashcopy.com

Hey! My friends, If you like my post you can save it using "Save Page as PDF" button below and you can even share them to your friends with social networking buttons provided below this post.

Add To Google BookmarksStumble ThisFav This With TechnoratiAdd To Del.icio.usDigg ThisAdd To RedditTwit ThisAdd To FacebookAdd To Yahoo

Monday, August 8, 2011

StartUpLite : A Tool That Speeds Windows' startup

StartUpLite allows novice computer users to speed up their computer`s load time by disabling or removing unnecessary startup entries safely and effectively. The program scans for a few dozen programs that are found on many computers but are commonly deemed unnecessary and can be safely disabled to speed up the load time of your computer. StartUpLite does not delete any programs, it only disables their auto-startup registration, which can be undone later if needed. Some of the programs it scans for include Adobe Gamma Loader, IgfxTray, TkBellExe, SunJavaUpdateSched, QuickTime Task and many others. StartUpLite also provides a short description for each item to help you decide which ones you want to disable or remove.

This useful executable helps identify and disable unnecessary start-up programs. StartUpLite's simple single window interface contains all the information needed to operate the applications.

Just run it and StartUpLite lists start-up programs it deems unnecessary. A short description is given for each item. Select programs also rate a short explanation describing how disabling the app would affect the system. Each listed program has three check box options to Disable, Remove, or perform No Action. Simply click to choose for each and press a single button to continue. The program removes or disables checked entries and recommends a system reboot.

StartUpLite doesn't offer a method to restore disabled programs, but presents a link to open Msconfig to perform the function. Less-experienced users should find this app helpful in uncovering unneeded start-up programs.

Download StartUpLite from Here

Source: malwarebytes.org

Hey! My friends, If you like my post you can save it using "Save Page as PDF" button below and you can even share them to your friends with social networking buttons provided below this post.

Add To Google BookmarksStumble ThisFav This With TechnoratiAdd To Del.icio.usDigg ThisAdd To RedditTwit ThisAdd To FacebookAdd To Yahoo

Sunday, August 7, 2011

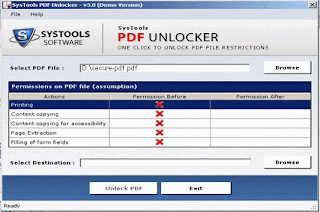
SysTools PDF Unlocker : The Best PDF Restriction Remover Tool

Are you searching for some genuine and highly advanced PDF Unlocker tool so that it would be easy for you to unlock PDF restrictions from your locked Adobe Acrobat PDF files. Once restrictions are removed performing operations like (editing, printing, copying, extractions) thus becomes possible. You are trying your hand for some PDF Unlocker commercial package which makes it possible for you to remove “Owner” password from PDF file. 

SysTools PDF Unlocker software is an easy-to-use and thus one of the best PDF restriction remover tools that you can easily use to unlock PDF files.


PDF Unlocker is a shareware, however you can either try the demo version (not that impressive as leaves a watermark) or search for the free versions available. The tool is great for people who are very much interested in buying it.

Download SysTools PDF Unlocker from Here

Source: pdf-unlocker.com

Hey! My friends, If you like my post you can save it using "Save Page as PDF" button below and you can even share them to your friends with social networking buttons provided below this post.

Add To Google BookmarksStumble ThisFav This With TechnoratiAdd To Del.icio.usDigg ThisAdd To RedditTwit ThisAdd To FacebookAdd To Yahoo

Friday, August 5, 2011

EASEUS Partition Master : A Partition Software for USB hard drive Partition

Although there are lots of partition tools in the market, most of them are charged. Few partition tools are really free for USB hard drive partition.

To optimize the performance of your USB hard drive, a third party application is needed. EaseUS Partition Master Home Edition, a freeware to manage partition, works as a powerful and magic partition software. With this partition freeware, you could enjoy a wonderful experience of managing your partition like a magic, such as Resizing, Copying, Creating, Deleting partitions and so on. Especially you can enjoy extend NTFS system partition without reboot and Dynamic Disk Copy.

This partition freeware works perfectly with hardware RAID and Windows 2000/XP/Vista/Windows 7 32/64 bit Operating Systems. Moreover, with user-friendly interface, you can partition your USB hard drive with very simple operations. So no matter you are a computer expert or not you can perform USB hard drive partition easily. The most shining point of this freeware is that your data is completely protected during the process of partitioning your USB hard drive.


How to Partition USB Hard Disk with this Partition Freeware?

1. Launch EaseUS Partition Master.

2. Select the hard disk partition to be resized and click Partitions > Resize/Move partition.

3. On the disk map, current size of the partition is displayed on the top of the dialog box. The map also depicts the used and unused space within the partition and the free space surrounding the partition (if any exists). The minimum and maximum sizes that you can resize a partition appear below the map.

4. Position the mouse pointer on the left or right partition handle.

5. The mouse pointer changes to a double-headed arrow.

6. Drag the handle to the partition size you want.

7. Click OK.

Download EASEUS Partition Master from Here

Source: partition-tool.com

Hey! My friends, If you like my post you can save it using "Save Page as PDF" button below and you can even share them to your friends with social networking buttons provided below this post.

Add To Google BookmarksStumble ThisFav This With TechnoratiAdd To Del.icio.usDigg ThisAdd To RedditTwit ThisAdd To FacebookAdd To Yahoo

Thursday, August 4, 2011

calibre : Converts your e-books from one format to another


calibre is free and open source e-book computer software that organizes, saves and manages e-books, supporting a variety of formats. It also supports e-book syncing with a variety of popular e-book readers.

calibre is cross-platform (programmed in Python and C) and is intended for the three main operating systems, Linux, Mac OS X and Windows. calibre was originally called libprs500, but was renamed calibre (lower case 'C') in mid-2008.
calibre supports the conversion of many input formats to many output formats. It can convert any of the following input formats to any of the output formats.

Input Formats: CBZ, CBR, CBC, CHM, EPUB, FB2, HTML, LIT, LRF, MOBI, ODT, PDB, PDF, PML, PRC^, RB, RTF, TCR, TXT
Output Formats: EPUB, FB2, LIT, LRF, MOBI, OEB, PDB, PDF, PML, RB, RTF, TCR, TXT.

calibre is primarily an e-book cataloging program. It is designed around the concept of the logical book, where a single database entry corresponds with the same book in a variety of formats. calibre supports the following formats for cataloging: AZW, AZW1, CBR, CBZ, CHM, EPUB, FB2, HTML, IMP, LIT, LRF, LRX, MOBI, ODT, OEBZIP, OPF, PDB, PDF, PML, PMLZ, PRC, RAR, RB, RTF, SNB, TPZ, TXT and ZIP.

Download calibre from here

Source: calibre-ebook.com

Hey! My friends, If you like my post you can save it using "Save Page as PDF" button below and you can even share them to your friends with social networking buttons provided below this post.
Add To Google BookmarksStumble ThisFav This With TechnoratiAdd To Del.icio.usDigg ThisAdd To RedditTwit ThisAdd To FacebookAdd To Yahoo

Thursday, July 14, 2011

GSplit : Splits Large Files Into Smaller Self-Uniting Pieces

GSplit is a powerful file splitter that lets you split your large files (like Self-Extracting and Zip archives, multimedia, song, music, picture, document files...) into a set of smaller files called pieces. These pieces are easier to copy to floppies, distribute over the Internet or through E-mail, share with friends or colleagues, archive to Zip disks or CDs. The pieces can be easily combined, using the generated Self-Uniting Executable, that automatically restores the original file for you without requiring GUnite. GSplit also includes advanced features like different splitting methods (blocked or spanned disks pieces), CRC32 checks (detects file corruption), splitting logs, keep file information, create specific pieces with your own names and shell integration.

GSpilt installs easily and works as a service from your context menu or through a Mac-like interface. With GSplit, you can simply point to a file and choose to split it. You can set the utility to default to a set number of pieces and specific placement, or have it question you each time. Using the novice-friendly interface is almost as easy. You follow the well-designed menus and answer simple questions. The program gets easier to use every time you split a file. Knitting the pieces back together is the easiest we've seen. The pieces are numbered and you simply execute the first one. Gsplit opens an informational dialog and combines the pieces almost instantly. Since the pieces are self-knitting, you don't need to send GSplit to those receiving your split files.

GSplit breaks apart any type of file, but isn't able to break apart media files into playable pieces. It is free, novice friendly, and complex enough for advanced users.

Download GSplit from Here

Source: gdgsoft.com

Hey! My friends, If you like my post you can save it using "Save Page as PDF" button below and you can even share them to your friends with social networking buttons provided below this post.

Add To Google BookmarksStumble ThisFav This With TechnoratiAdd To Del.icio.usDigg ThisAdd To RedditTwit ThisAdd To FacebookAdd To Yahoo

Wednesday, July 13, 2011

How to Update Facebook Status From Google Plus?

Google plus is the newbie in the market of social networking site. It is gaining the popularity in high speed, surely a big threat to the Facebook, who is leading in the race of competition.

A new Web browser extension called Google+Facebook inserts Facebook's social network right into your Google+ stream view, accessible through a new "Facebook" button at the top of the page. Although fun, the extension does need some work, if we're being honest. Google+Facebook is pretty basic right now. All it does is display your News Feed within the Google Plus interface. But to like or comment on any item, you have to click the link "view this post on Facebook." There's also no access to other Facebook features like Games, Events, Profiles, Friend Requests or Photo Albums.

Follow these steps:
  • Install the plugin (Download Link is provided at the end of the post!!)
  • It will ask for permission for accessing basic information from Facebook. Just allow it!!
  • You will need to connect with the Facebook to activate Google + Facebook.

  • Restart Browser
  • Go to Google plus.
  • Connect with Facebook.Start updating.
  • Click on "Whats on your mind"
  • Enter your Status in the new Window

  • Share and you can see the status updated from Google plus in the Facebook page....It shows "via Googleplus"

Note: The Google+Facebook extension is currently supporting Chrome and Firefox only. Due to https:// security level issues with Internet Explorer, Google+Facebook does not support IE. We are working on a fix for that.

Most of the people wants Google plus. If anybody need please ask me. I have invitations.

Download Plugin from Here

Source: crossrider.com

Hey! My friends, If you like my post you can save it using "Save Page as PDF" button below and you can even share them to your friends with social networking buttons provided below this post.

Add To Google BookmarksStumble ThisFav This With TechnoratiAdd To Del.icio.usDigg ThisAdd To RedditTwit ThisAdd To FacebookAdd To Yahoo

Tuesday, July 12, 2011

Simple Text Splitter : Splits Text based Files into Smaller Chunks

Are you looking for a way to split a big text file into multiple chunks? Simple Text Splitter is an easy-to-use portable text splitter which is basically designed to split text based files such as txt, log, srt, etc into many smaller chunks. It has a user-friendly interface that is very lightweight and consumes minimal resources.

All the options are self explanatory, simply run it and specify the file to be broken into smaller pieces from the Open Text button. Now choose the number of chunks from the Number of chunks drop down box, then specify the destination folder for the resulting chunks by selecting the output folder. You may distinguish these chunks by adding the desired output naming style from the Naming portion. Choose any one between Add Part to file name, Add only part, or Add number as per your requirement. Once done with the settings click the START button to split the large file into smaller pieces.

Download Simple Text Splitter from Here

Source: sourceforge.net

Hey! My friends, If you like my post you can save it using "Save Page as PDF" button below and you can even share them to your friends with social networking buttons provided below this post.

Add To Google BookmarksStumble ThisFav This With TechnoratiAdd To Del.icio.usDigg ThisAdd To RedditTwit ThisAdd To FacebookAdd To Yahoo

Monday, July 11, 2011

SiteShoter : Captures Website Screenshot

If you ever need to take a screenshot of a whole website, you'll face a common problem: how do you capture the complete webpage, from top to bottom?

The answer is SiteShoter, a really simple tool that's been specifically designed to capture websites. It's a standalone app – not a web browser plug-in – that can take screenshots from a given webpage just by entering its URL in SiteShoter's interface.

SiteShoter enables you to capture screenshots of any website by simply entering the URL and selecting some options. You can choose from full-size captures, set a specific browser size, crop the capture to custom specifications and optionally resize the output to a percentage of the original. The program uses Internet Explorer to load and capture the website in a hidden window and saves it to .png, .jpg, .tiff, .bmp or .gif format.

You can use SiteShoter in user interface mode, or alternatively, you can run SiteShoter in command-line mode without displaying any user interface.

You can also use SiteShoter to convert .html file on your local drive into image file.
You can use SiteShoter in user interface mode, or alternatively, you can run SiteShoter in command-line mode without displaying any user interface.

Download SiteShoter from Here

Source: nirsoft.net

Hey! My friends, If you like my post you can save it using "Save Page as PDF" button below and you can even share them to your friends with social networking buttons provided below this post.

Add To Google BookmarksStumble ThisFav This With TechnoratiAdd To Del.icio.usDigg ThisAdd To RedditTwit ThisAdd To FacebookAdd To Yahoo

Sunday, July 10, 2011

Kwik-Loupe: A Simple Screen Magnifier


As we can find a screen magnifier by default in Windows that can magnify the text and the display around the cursor but it is limited to the magnification range achieved. So to solve this problem we have another screen magnifier for all those people who need to zoom much into the screen.

Kwik-Loupe is a small, easy-to-use and simple screen magnifier. Kwik-Loupe also features magnification ranges from 2x to 64x with a quick locate option to position the viewing window.

The tool magnifies the area around the mouse pointer. The tool is surely useful if you need to magnify to some high levels in a document or in an image. The tool is available for free from the link below.

Download Kwik-Loupe from Here

Source: oatsoft.org

Hey! My friends, If you like my post you can save it using "Save Page as PDF" button below and you can even share them to your friends with social networking buttons provided below this post.

Add To Google BookmarksStumble ThisFav This With TechnoratiAdd To Del.icio.usDigg ThisAdd To RedditTwit ThisAdd To FacebookAdd To Yahoo

Saturday, July 9, 2011

How To Add Google +1(plus) Button in Blogger or Blogspot?

Few days back, Google released its Google +1 (“plus one”) button to compete with Twitter’s Tweet button and Facebook’s Like button. This is a big step towards adding the social aspects to the search results. If you have not incorporate it into your website, do it as soon as possible. Because, This button can generate a potential traffic and exposure to your web site. All your visitor need to have a Google account to use your Google button.

Follow these steps:

Step 1 : First enable share buttons for blogger editing the Blog Posts widget from Page Elements section.


Step 2 : Go to "Edit HTML". Click on "Expand Widget Templates"

Step 3 : Find this and remove it:


Note : If you can not find above code, then skip that step.

Step 4 : Now add below code just above the <head> tag


Step 5 : Scroll down to where you see below code:


Step 6 : Now Copy below "Blogger Sharing buttons" code and paste it just below the above code.

NOTE: If you can't find <div class='post-header-line-1'/> in your template, paste "Blogger Sharing buttons" code just before <data:post.body/> .


This will show blogger sharing buttons below post header in blogger post pages..But if you want to show share buttons below blogger post,then paste your code just after <data:post.body/>.

Also if you want to show share button in every page, then remove the first and last lines form above code.

Step 7 : Now save your template and you are done.

Hey! My friends, If you like my post you can save it using "Save Page as PDF" button below and you can even share them to your friends with social networking buttons provided below this post.

Add To Google BookmarksStumble ThisFav This With TechnoratiAdd To Del.icio.usDigg ThisAdd To RedditTwit ThisAdd To FacebookAdd To Yahoo

Friday, July 8, 2011

How To Add Google +1(plus) favicon that is shown in address bar?

This quick and easy tutorial will explain how to add Google +1 favicon in address bar.

First of all, Make your favicon of Google +1 and Upload your favicon to the web.

Go to blogger Dashboard > Design > Edit Html

Now, Find this code:


Add this code before the code above


(Replace URL OF YOUR FAVICON FILE with url of your icon)

Again, find this code:


Add this code before the code above


Save template and you get your favicon on the address bar.

Hey! My friends, If you like my post you can save it using "Save Page as PDF" button below and you can even share them to your friends with social networking buttons provided below this post.

Add To Google BookmarksStumble ThisFav This With TechnoratiAdd To Del.icio.usDigg ThisAdd To RedditTwit ThisAdd To FacebookAdd To Yahoo

Thursday, July 7, 2011

Simpo PDF to Word : A PDF to Word Converter Tool for Windows

Simpo PDF to Word is designed to convert read-only PDF to editable Word files, even encrypted PDF could be converted easily. It could convert PDF to Word with high quality, preserves graphs, tables and text layouts even curve, rectangle and hyperlinks. What's more, it is a standalone PDF to Word converter, so, you don't need to install extra Microsoft Word and Adobe Acrobat or Reader.


You can use Simpo PDF to Word to convert a batch of PDFs to doc to save time, it only takes you several seconds, even less time to get converted Word documents in 500% faster speed.

Download Simpo PDF to Word from Here

Source: simpopdf.com

Hey! My friends, If you like my post you can save it using "Save Page as PDF" button below and you can even share them to your friends with social networking buttons provided below this post.

Add To Google BookmarksStumble ThisFav This With TechnoratiAdd To Del.icio.usDigg ThisAdd To RedditTwit ThisAdd To FacebookAdd To Yahoo

Wednesday, July 6, 2011

Companel : Add to, Remove Items from Computer and Control Panel

You may know a tool known as Computer Customizer. Companel is the new version of that software, that is capable of creating new direct access icons in My PC and, as a new feature, in the Windows control panel.


Companel is a portable utility which allows you to add, remove, Items in My Computer and Control Panel. It is the next version of Computer Customizer. It allows you to add 65+ Items in My Computer and some Items in Control Panel.

The items are divided into the common items and must have items tabs. Some of the new options of the Common Items tab are access to the Windows Firewall, Power Options, Backup and Restore, Phone and Modem, and Recovery.

The Must have items, which previously were called Other Items, now include links to items such as Default Programs, System Restore, the Recycle Bin, Personalization and the Credential Manager.

The functionality remains the same. You pick the items you want from the list by placing a checkmark in their box. A click on Apply Changes at the end of the process adds links to the selected programs and features to My Computer.

Download Companel from Here

Source: companel.en.malavida.com

Hey! My friends, If you like my post you can save it using "Save Page as PDF" button below and you can even share them to your friends with social networking buttons provided below this post.

Add To Google BookmarksStumble ThisFav This With TechnoratiAdd To Del.icio.usDigg ThisAdd To RedditTwit ThisAdd To FacebookAdd To Yahoo

Tuesday, July 5, 2011

Google +1 : Everything You Need to Know About it!

Google +1 is yet another attempt to make Google more social. It's Google's version of the Facebook "likes", a simple feature that's very powerful because it's part of a social network.

Google will show +1 buttons next to all search results and ads, while encouraging other sites to include the buttons. All +1's are public and they're tied to Google Profiles. The goal is to use this data to personalize search results and ads by recommending sites +1'd by your friends. Google Social Search already does this, but there's no support for Facebook likes, so Google had to come up with a substitute.

Sometimes it’s easier to find exactly what you’re looking for when someone you know already found it. Get recommendations for the things that interest you, right when you want them, in your search results.

The next time you’re trying to remember that bed and breakfast your buddy was raving about, or find a great charity to support, a +1 could help you out. Just make sure you're signed in to your Google Account.

In order to +1 things, you first need a public Google profile. This helps people see who recommended that tasty recipe or great campsite. When you create a profile, it's visible to anyone and connections with your email address can easily find it.

Your +1’s are stored in a new tab on your Google profile. You can show your +1’s tab to the world, or keep it private and just use it to personally manage the ever-expanding record of things you love around the web.

The +1 button is shorthand for "this is pretty cool" or "you should check this out."

Click +1 to publicly give something your stamp of approval. Your +1's can help friends, contacts, and others on the web find the best stuff when they search.

Source: www.google.com/+1/button

Hey! My friends, If you like my post you can save it using "Save Page as PDF" button below and you can even share them to your friends with social networking buttons provided below this post.

Add To Google BookmarksStumble ThisFav This With TechnoratiAdd To Del.icio.usDigg ThisAdd To RedditTwit ThisAdd To FacebookAdd To Yahoo

Saturday, July 2, 2011

Nagios XI : A Free Network Monitoring Tool

Nagios XI is the most powerful IT infrastructure monitoring solution on the market. Nagios XI extends on proven, enterprise-class Open Source components to deliver the best monitoring solution for today's demanding organizational requirements.


Designed for scalability and flexibility, XI is designed to make problematic IT monitoring tasks simple, while retaining the powerful attributes of its enterprise-class foundation blocks.

You can monitoring a complete network along with your servers including, DNS, DHCP, active directory, web server and many more. NagiosXI is free and you and its completely Linux based. There are Virtual machines available on the website that you just need to copy and start and you will be in control.

Nagios XI is a product built upon Nagios Core (the open source offering) that really makes Nagios much easier to use and configure, due to its nice PHP front-end and some really slick sugarcoating.

Nagios XI does what Nagios Core does: it monitors hosts and services. Hosts can be almost anything: a router, remote Linux server, a remote Windows system, a web site. The services that can be monitored are impressive: ping responses, memory usage, CPU usage, bandwidth usage, whether a website has changed content, whether a particular service is available (e.g. SMTP, HTTP, DHCP, etc.) and a lot more. Nagios, both Core and XI, is impressive.

Download Nagios XI from Here

Source: nagios.com

Hey! My friends, If you like my post you can save it using "Save Page as PDF" button below and you can even share them to your friends with social networking buttons provided below this post.

Add To Google BookmarksStumble ThisFav This With TechnoratiAdd To Del.icio.usDigg ThisAdd To RedditTwit ThisAdd To FacebookAdd To Yahoo

Friday, July 1, 2011

Google Books Downloader : A Tool That Downloads Google Books to PDF and JPG

Google has announced the launch of its new service; Google Books. Currently, you can purchase books (U.S. only) or download more than 3 million free books from anywhere in the world using this service.

As announced by Google, the aim of this project is to provide users with their own bookshelf on hand, no matter where they are. Purchased or downloaded books can be read using a desktop browser, as well as through mobile devices based on the Android operating system or iOS. Additionally, the books can be read on any e-reader with Adobe Digital Editions software.


As opposed to the Picasa service which provides an access to photos, the Google Books service does not allow users to download free electronic editions without digital copy protection and use them on other devices. Google Books Downloader is a little software that allows you to save these books in PDF or JPEG format (note: it supports only the books marked as "full view").

Download Google Books Downloader from Here

Source: gbooksdownloader.com

Hey! My friends, If you like my post you can save it using "Save Page as PDF" button below and you can even share them to your friends with social networking buttons provided below this post.

Add To Google BookmarksStumble ThisFav This With TechnoratiAdd To Del.icio.usDigg ThisAdd To RedditTwit ThisAdd To FacebookAdd To Yahoo

Thursday, June 30, 2011

How To Add Google +1 Button Into BlogSpot Blog ?

Like Facebook, Twitter Sharing button where user can share the content which he/she likes on facebook or Twitter respectively, Now Google has also released an similar button which is Known as Google +1.

When a User Hits Google +1 Button, this will help his/her contacts or others on web to find the best result when they search on Google.

Now if you want to Add the Google +1 Button to your Blogger (Blogspot) Blog then follow the procedure given below:
  • Login into your Blog.
  • Go to Blogger Dashboard > Design > Edit Html.
  • Now Click on “Expand Widget Template”.
  • Search for </head> and just above it add the following code.

  • Now Search for <data:post.body/> and Immediately above or Below (Depends on where you want to Display the Google +1 Button) this add the following Code.


Now you can configure the Button Settings in the above code, Like what size Button you need on your Blog and their are four Sizes you can Choose from “small”, “standard”, “medium” or “tall” and also the location of the button in your blog and whether you want it to be displayed in left or right side you can change that in the above code.

Source: blogisblogging.com

Hey! My friends, If you like my post you can save it using "Save Page as PDF" button below and you can even share them to your friends with social networking buttons provided below this post.

Add To Google BookmarksStumble ThisFav This With TechnoratiAdd To Del.icio.usDigg ThisAdd To RedditTwit ThisAdd To FacebookAdd To Yahoo

Wednesday, June 29, 2011

fbDownloader : A Tool To Download Facebook Albums in One Click


FBDownloader is a small, simple, easy to use application specially designed to help you download your tagged photos, friend photos and albums from facebook directly to your PC.

Basically all that you have to do is login to your Facebook account and select the images to download and you're good to go. So, if you want a tool to help you download your photos with just a click, then take FBDownloader for a spin and see if its capabilities are enough to satisfy your needs.

Bottom line is this is really good software, and it's free and easy to use. There is no reason to not download this onto your computer right now, even if you don't need it immediately. It makes downloading all your favorite photos on Facebook so easy, and gets the job done in half the time. You can download isolated photos, or entire albums, or just random tagged photos. A great feature is that as you download the photos, you can re-size them before saving. This is just great, simple free software.

Read more: FBDownloader - Free software downloads and software reviews - CNET Downloads http://download.cnet.com/FBDownloader/3000-2071_4-75446759.html#ixzz1QS0tzEhR

Download fbDownloader from Here

Source: fbdownloader.com

Hey! My friends, If you like my post you can save it using "Save Page as PDF" button below and you can even share them to your friends with social networking buttons provided below this post.

Add To Google BookmarksStumble ThisFav This With TechnoratiAdd To Del.icio.usDigg ThisAdd To RedditTwit ThisAdd To FacebookAdd To Yahoo

Tuesday, June 28, 2011

What is GoogleCrashHandler.exe ?

If you use any Google product like the Google Chrome or any other tool then you are likely to see GoogleCrashHandler.exe process in your task manager. So what is GoogleCrashHandler.exe then?


GoogleCrashHandler.exe is one of the two Google processes – the other is GoogleUpdate.exe – that might be running on the computer system. GoogleCrashHandler.exe will send anonymous usage data and crash reports to Google. It is an opt in service during installation of Google software products.

GoogleCrashHandler.exe runs continuously on your computer if you’ve selected to send anonymous usage statistics and crash reports to Google for certain Google software, like Google Chrome. It helps send crash details to Google when your Google software unexpectedly shuts down. We use this data to help determine how to prevent these errors from happening in the future.

Here is how you can stop GoogleCrashHandler.exe to run automatically in background:

1. Open Google Chrome

2. Go to File Menu >> Options

3. Click the tab Under The Hood, and uncheck the option which says – Help Google Chrome better by automatically sending the usage statistics and crash reports to google.

4. Click Close, after doing as un checking this option you will not see GoogleCrashHandler.exe running again.

Hey! My friends, If you like my post you can save it using "Save Page as PDF" button below and you can even share them to your friends with social networking buttons provided below this post.

Add To Google BookmarksStumble ThisFav This With TechnoratiAdd To Del.icio.usDigg ThisAdd To RedditTwit ThisAdd To FacebookAdd To Yahoo